Warning: This version of PowerPTC is no longer supported and will no longer receive security updates, please visit http://cwssoft.com/powerptc for the most current version of PowerPTC.
Scheduling Parent-Teacher Conferences
Power PTC is designed to make Parent-Teacher conference scheduling very easy and fast. To setup your appointments, perform the following steps:
Automatic Scheduling
- Open a web browser and navigate to the address of you school’s Power PTC server. This address should have been provided to you by your student’s school or district.
- At the Power PTC login screen (pictured below) login using your existing account.

- Click on Schedule Conference.

- Select a conference date and a time when you would like your appointments to start.
- If there are any courses that you would not like to schedule for conferences, uncheck the box next to the course.
- Click Build Schedule.
- When scheduling is complete you will be presented with the status of your schedule build. Click on View/Edit My Schedule to view or modify your appointments.

Manual Scheduling
- Open a web browser and navigate to the address of you school’s Power PTC server. This address should have been provided to you by your student’s school or district.
- At the Power PTC login screen (pictured below) login using your existing account.

- Click on Schedule Conference.

- Click on Manually Schedule.
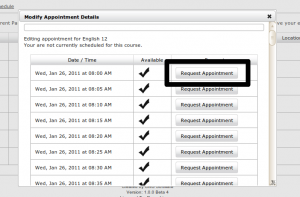
- To schedule for a course, click on the Edit button next to the course.

- To request an appointment, click on the Request Appointment button.

Printing Your Schedule
Once you have scheduled appointments for your student(s), you can generate a printable version (pdf) of your schedule. To print your schedule, perform the following steps:
